The on-site roof inspection should be completed as soon as you have determined that the job is one you are qualified and prepared to perform. For more information on bidding on new construction and retrofit projects, consulting with the business owner, building a roof history and more, view last week’s blog: The Bidding Process. After obtaining satisfactory answers about the building’s construction and history, begin an investigation of the building itself.
Your objective is to get a clear picture of the condition of the building and existing roof so that the bid you submit accurately reflects the costs involved. If extensive repair and construction work appears necessary, you will need to figure in the extra time, labor and materials. You may need to obtain estimates if subcontractors will be providing reconstruction or repair work.
Taking Photos or Video
During this physical inspection stage, using a camera or video camera is strongly recommended. Useful in putting together your bid, the photos or video you take during inspection also serve to document preexisting problems and conditions. In the event that a building owner later discovers damage to the building or property, your pre-inspection pictures are evidence that damage was in existence prior to the presence of you or your crew. Photographs or video protect you and your reputation.
Interior Inspection
When inspecting the inside of a building, begin by looking at the ceiling. Is there evidence of leakage? Look for sagging suspended roofing, water stains, and wet tiles, and make a note of their location. Later, in the actual roof inspection stage, you will check to see if they corresponded to flaws visible from the exterior. With metal ceilings, rust stains from condensation can be your clue. Up-close investigation will determine if the deck is still sound enough to roof over, or will require complete tear-off.
Take note of the building’s ventilation provisions. While this is important in any case, it is of particular concern in buildings with metal roof decks. Voids or seams in the deck may currently be serving as building ventilation. Continuous roof membranes such as Conklin roofing systems tend to seal off these voids, preventing vapor and moisture escape. Serious condensation problems (which owners may interpret as a leaking roof) could result if new ventilation provisions are not made. This factor must be considered in your bid.
Exterior Inspection
Once you have assessed the building’s interior, an exterior investigation is in order. Follow the same procedure as before, taking pictures of the building grounds and exterior, noting any structural problems such as cracks in the walls or foundation, or evidence of settling or erosion. If such problems exist, bring them to the owner’s attention and request an engineer’s inspection to determine the building’s stability.
Grounds
You may want to go beyond the building itself and take a look at the parking facilities, sidewalks and landscaping surrounding the structure. It is an unfortunate fact that in the past, roofing contractors have been held liable for damaged sidewalks and shrubbery, which were, in fact, preexisting conditions. With documentation in the form of photographs, video and dated notes, you can help protect yourself against such claims.
Inspecting the Roof
In looking at the roof itself, there are several factors, which will affect your bid. First and foremost, consider the general condition of the actual roof. Evaluate its appearance both in the center and around the perimeter.
On a built-up roof, look for signs of:
- Checking, splitting, blistering, gravel turnover
- Ply separation, ridging, bare felts
In areas of the roof display severe blistering, splitting, or alligatoring, the substrate must be repaired or replaced before any coating can be applied. Failure to do so could result in later complications with the roof and coating, requiring you to make repairs at your own expense.
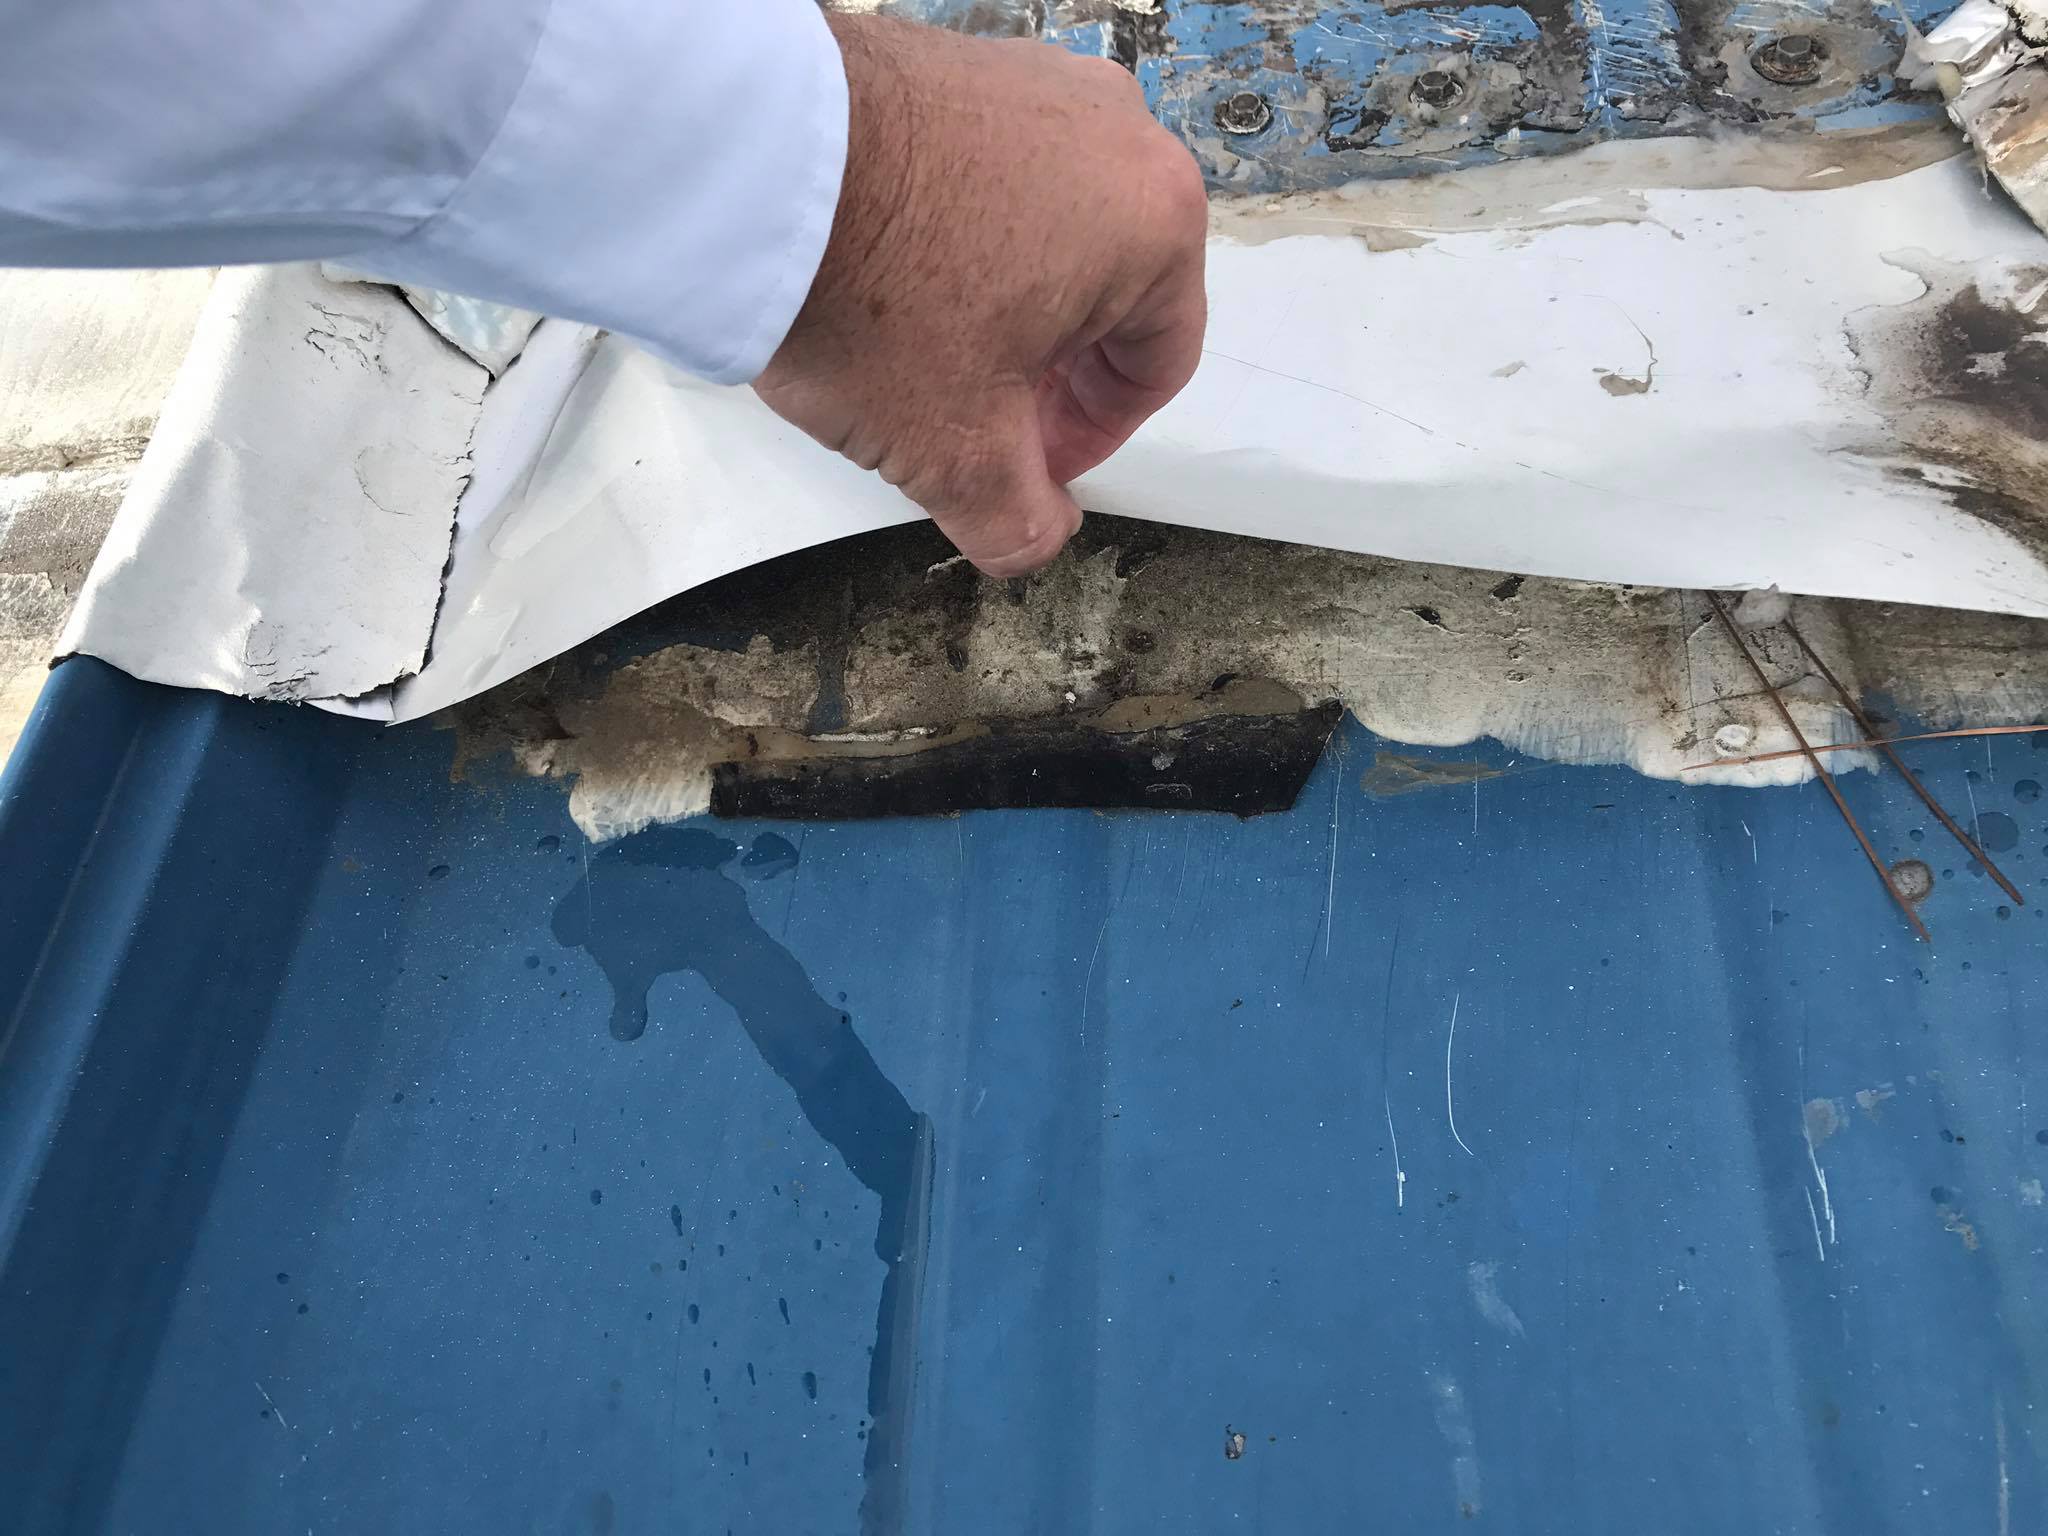
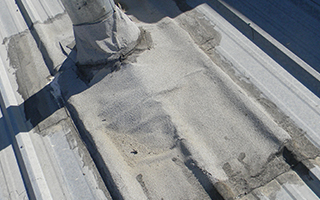
Be sure to check the exterior parapet walls for deterioration. This can be the result of either flashing problems or structural instability. Also, check all roof protrusions such as skylights, vents and air conditioning units for signs of leakage. If the flashing or seals around any of these are defective, they will need to be replaced.
On a roof of plain galvanized metal, look for evidence of rust and check out the method or attachment to the structure below. Examine the condition of the screws and nails holding the metal panels in place. Are they still secure, or have they worked loose? Any loose screws or nails will have to be retightened or replaced.
Drainage
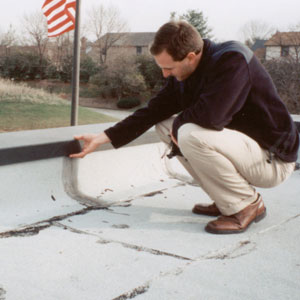 Besides the general condition of the roof, one of the most important things to note is the drainage provided. Minimum industry standards call for slope of at least ¼” per foot. However, even with this degree of slope a roof can settle and weather into depressions, which collect water.
This commonly occurring problem, known as “ponding,” is a result of ineffective drainage. Ponding is defined as thirty-six or more square feet of water at least ¼” deep forty-eight hours after a rain. A ponding problem can threaten the life of the roof and the building underneath. This problem cannot account for more than 5% of the entire roof surface.
Any roof you work on should shed water completely. If it does not, you must remedy the problem. This means either the addition of a new drain wherever ponding occurs of the installation of crickets, tapered boardstock or polyurethane foam to build up the low areas and guide water toward existing drains.
Structural Load
Due to the weight of roofing felts and bitumen, the maximum allowable layering is two built-up roofs. Frequently, you may encounter situations where more than two complete built-up roofs have been layered in an effort to solve chronic leakage problems. This places a tremendous load on the supporting deck. Also, roofs exceeding the two-roof limit tend to be unstable and should be removed to two built-up roofs or less. Some local building codes may also prohibit more than two roof layers due to weight loads.
If the owner wishes you to put down new material, it is important to know the present roof load. If it is already near the building’s structural limits, the old roof must be completely removed and a new one installed. Tear-off and reconstruction involve a tremendous amount of time and labor, so it is important to determine this before you submit our bid.
Taking Core Samples
Contractors join our group for:
- Network-backed Guarantees
- Support from Fellow Roofers
- Group Discount Purchasing
- Shared Marketing Strategies
Use core samples to determine the type of insulation in place and its thickness. This can help you decide whether additional insulation needs to be added, and at what rate. The sample will also reveal the moisture content of the roofing material. Even if the surface layers of the roof appear to be dry, moisture in the bottom layers can badly blister your new system. Knowing this moisture factor is essential. No Conklin Roofing System may be applied over a damp roof.
Pay special attention to gravel built-up roofs, which can appear on the surface to be dry and level, but may be masking severe ponding problems. Always dig down through gravel or other loose aggregate and make certain the roof is not wet underneath. Core samples provide the best security.
A core sample can also help you assess what the roof deck itself is comprised of. From the interior of a building, looking up, the deck may appear to be metal, but a roof sample may reveal it to be metal topped with wood or concrete.
If the deck is made of wood, you need to determine its moisture content and assess the possibility of rot, mold or insect infestation. With concrete, important clues to look for are cracking, mildew and decomposition. These conditions often call for a complete roof tear-off, so an early diagnosis is critical.
One final benefit of taking roof samples is the discovery of how the substrate was adhered to the roof deck. Since there are a handful of right ways and hundreds of wrong ways to fasten a roofing system to a deck, it is important to know how each substrate is adhered to the deck before you start. Was it mechanically fastened or simply “glued down” with a layer of hot asphalt? If an inadequate method of adhering was initially used, the whole substrate could eventually work itself loose, delaminating Conklin coating.
Assessing a roof’s condition and getting a handle on the costs and risks involved can be somewhat difficult. No two situations are ever exactly the same. If there is ever a question in your mind about the integrity of a roof deck or substrate, or how to go about testing them, do not hesitate to call Conklin’s Building Products Department. These specialists can answer your roofing questions and offer tried and true suggestions.
Nondestructive Moisture Detection
One of the most important reasons for obtaining core samples is the need to identify and replace any areas of trapped moisture. However, should the owner object to your cutting into the roof for core samples, there are alternative, nondestructive methods for locating roof moisture. As the name implies, nondestructive methods provide this information without damage to the roof membrane.
Nuclear Moisture Detection
Nuclear moisture detectors work by identifying the hydrogen atoms in water by means of a radioactive source. The source contains about one milligram of radioactive radium or americium and a small about of beryllium. Neutrons are generated in the detection unit and travel outward until they encounter atoms in the roof system. The neutrons then slow down, and some are bounced back toward the unit. A counter on the nuclear detector records the number of returning neutrons, which translates into the number of hydrogen atoms, i.e. water, in the roof.
These figures are plotted on a grid of approximately four square feet and take from one to five minutes per measurement. The hand-held detector itself is about the size of a lunch box and weighs approximately twenty pounds.
Capacitance Methods
Capacitance methods of moisture detection are based on the fact that most materials have dielectric constants. The capacitance unit has two metal pads, which sit on the roof while an electrical current is passed between them. The curve of the resulting electrical arc determines the dielectric constant present. While the dielectric constant reading of most dry, solid roofing materials is in the one to four range, a constant of nearly eighty is expected for water. Thus, elevated readings indicate both the presence and severity of the moisture problem.
The capacitance equipment can take these readings within two minutes, but the roof surface must be completely dry for accuracy. Measurements are made on a grid, just as in nuclear detection.
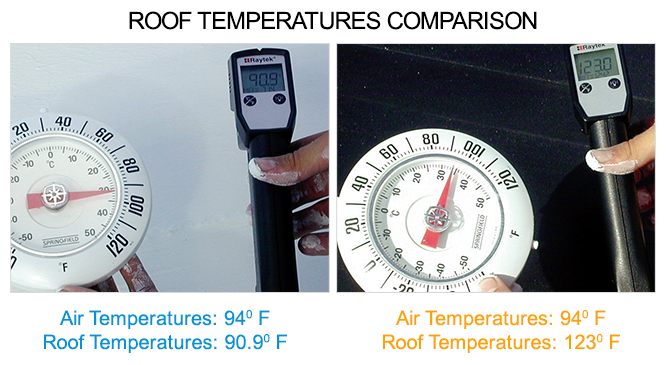
Infrared Imagery or “Thermography”
Infrared imagery, or thermography, detects the loss of heat through the roof. When a roof becomes wet, its insulation properties are reduced. The most areas of the roof conduct more heat through the roof than the dry areas. This is revealed through light and dark areas on the film or video.
This form of thermography is most often accomplished by flying over a roof at night while taking aerial infrared pictures. A lack of detail, however, often occurs when the images are recorded from such altitudes.
Greater accuracy is actually achieved when hand-held equipment is used while the roof is walked. The wet areas are documented on film or video, then marked off on the roof with spray paint. With this type of close-range thermography, the entire roof is scanned, generating data on every square foot. Best results are achieved at dawn or dusk, when the temperature differential is greatest.
To follow up any nondestructive test method, areas which indicate moisture should be core sampled as previously described to verify the degree of wetness. The results of the core sample will show if any material replacement is necessary.
Evaluating the Job: Some Cost Considerations
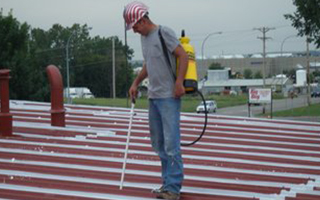
In addition to all typical major costs, such as the product and labor required, other factors will need to be considered before you submit our bid. One is “bucket loss,” the five to fifteen percent of the product, which remains on the sides of the product container. From a five-gallon container, therefore, you can expect to fully utilize only 4.25 to 4.75 gallons. Also, when using the spray application method, count on a wind loss of anywhere from 5-15%. The surface texture of the area to be coated also factors very strongly in the amount of product needed for adequate coverage.
Equipment costs vary from job to job, depending on the Conklin system used, the condition of the existing roof and the specific substrate preparation required.
Other costs, which are sometimes overlooked include:
- Transportation of crew and equipment to and from the job site, with allowance for fuel and vehicle wear.
- Wear and tear on rollers, brushes, ladders, and spray equipment. Also, figure in any fuel costs of operating your equipment.
- Special insurance costs, which may apply when working around or above expensive equipment.
- Costs to further inspections and repairs if a warranty agreement or maintenance contract is sold.
These are just some of the “hidden costs” of the roofing business. As you gain more and more experience in a greater variety of roofing jobs, you will no doubt develop lists of such expenses and develop a greater ability to accurately estimate each job. Accepting small jobs and working with your sponsor initially will help you gain this experience while minimizing your financial risk.
Many new construction and renovation projects run over-budget. Unfortunately, this roofing portion of the project is a common scapegoat for cost overrun. Because the roof is less noticeable, it is often the first area to suffer in a budget pinch. As you bid, bid specific work for a specific price. If either price or service change in the middle of a job, do not accept verbal changes. To protect yourself contractually and financially, keep every agreement exclusively in writing.
Whether your project involves reroofing, retrofit or new construction, insist on a pre-job conference with all interested parties. Get a clear picture of what you are expected to provide and at what price, which area of the project your proposal addresses, and what materials and labor are covered in the proposal. This coordination between parties will help ensure a high-quality, timely project with fewer disputes over costs and areas of responsibility.
 In the case of the General Contract award, as mentioned previously, subcontractors submit roofing proposals to the general contractors bidding on the job. The general contractors each evaluate their numerous subcontractor bids and submit a comprehensive bid to the owner. The winning contractor then awards the individual subcontracts for each different part of the job. Thus, a roofing subcontractor is contracted with, and employed by, the general contractor for the roofing portion of the project.
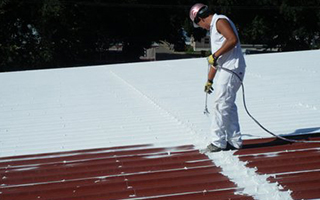
 We exclusively use Conklin roof systems because of their lab-tested durability and customer-verified reputation. However, the reputation of these roofing solutions is supported by more than just first-party R&D and feedback from building owners. The roof systems we apply have undergone stringent review by highly respected rating organizations such as International Code Council, UL, Cool Roof Rating Council, Factory Mutual, Florida Building Commission, Energy Star, and others.
 Class A roof coverings are effective against severe fire exposure. Under such exposures, roof coverings of this class are not readily flammable, afford a fairly high degree of fire protection to the roof deck, do not slip from position and do not produce flying bands.
 Underwriters Laboratories published a book entitled “Roofing Materials and Systems Directory” containing descriptions of roof covering materials that comply with the various requirements of each class.
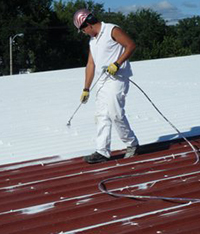 One of the most profound influences on roofing was a disastrous event which occurred in 1953. A massive fire broke out at a General Motors plant in Michigan, causing six deaths and more than $50 million in property damage. The 34-acre GM plant had a steel roof deck covered with a layered built-up roof (BUR) topped with an aggregate material. An under-deck fire heated the steel deck and melted down the bituminous materials of the BUR. The release of combustible liquids and vapors from the bitumen was a strong contributing factor to the spread of the fire. The magnitude of the blaze prompted much fire research, leading to the formation of the Factory Mutual system.
 ICC-ES came into being on February 1, 2003, when America’s four building product evaluation services officially combined their operations. The four “legacy” evaluation services that came together to form ICC-ES were the National Evaluation Service, Inc.; BOCAI Evaluation Services; ICBO Evaluation Service, Inc.; and SBCCI Public Service Testing and Evaluation Services, Inc. Through the legacy evaluation services, ICC-ES has a history that goes back more than seventy years.
 ENERGY STAR is a joint program of the U.S. Environmental Protection Agency (EPA) and the U.S. Department of Energy in helping us all save money and protect the environment thought energy efficient products and practices. In 1992, the US Environmental Protection Agency introduced ENERGY STAR as a voluntary labeling program designed to identify and promote energy-efficient products to reduce greenhouse gas emissions. Computers and monitors were the first labeled products. Through 1995, EPA expanded the label to additional office equipment products and residential heating and cooling equipment. In 1996, EPA partnered with the US Department of Energy for particular product categories. The ENERGY STAR label is now on major appliances, office equipment, lighting, home electronics and more. EPA has also extended the label to cover new homes and commercial and industrial buildings.
 Florida Building Codes and Standards staff the Florida Building Commission, which is responsible for the Florida Building Code.
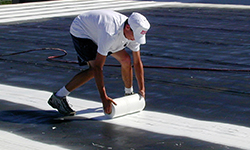 Building components, including roofing systems and those which protect the envelop of the building from being breached, must be approved by the BCCO Product Control Division prior to their use in building construction or rehabilitation.
 Green Buildings Initiative. Governor Arnold Schwarzenegger signed Executive Order S-20-04 regarding Green Buildings on December 14, 2004. It established the State of California’s priority for energy and resource-efficient high performance buildings. The Executive Order sets a goal of reducing energy use in state-owned buildings by twenty percent by 2015 (from a 2003 baseline) and encourages the private commercial sector to set the same goal.
 The Leadership in Energy and Environmental Design (LEED) Green Building Rating SystemTM is the nationally accepted benchmark for the design, construction, and operation of high performance green buildings. LEED gives building owners and operators the tools they need to have an immediate and measurable impact on their buildings’ performance. LEED promotes a whole-building approach to sustainability by recognizing performance in five key areas of human and environmental health: sustainable site development, water savings, energy efficiency, materials selection, and indoor environmental quality.